

If you want to enable “Sign in with GitHub” for platform users, that’s a separate OAuth App process and doesn’t interfere with the GitHub App permissions. This guide focuses on the functional integration. See GitHub OAuth App.
Prerequisites
Have your application domains ready:- WEB_DOMAIN: Your Frontend URL (e.g.,
https://app.yourdomain.comorhttp://localhost:3000) - API_DOMAIN: Your Backend/API URL (e.g.,
https://api.yourdomain.comorhttp://localhost:3000for monorepo/proxy setups) - WEBHOOK_DOMAIN (optional): Public domain for webhooks (e.g.,
https://kodus-webhooks.yourdomain.com). If you route/.../webhookon the API domain, you can useAPI_DOMAIN.
Step 1: Create the GitHub App
- On GitHub, go to Settings > Developer Settings > GitHub Apps
- Click New GitHub App
- Fill in the basic information (Name, Homepage URL) according to your preference

Step 2: Configure Callback and Setup URLs
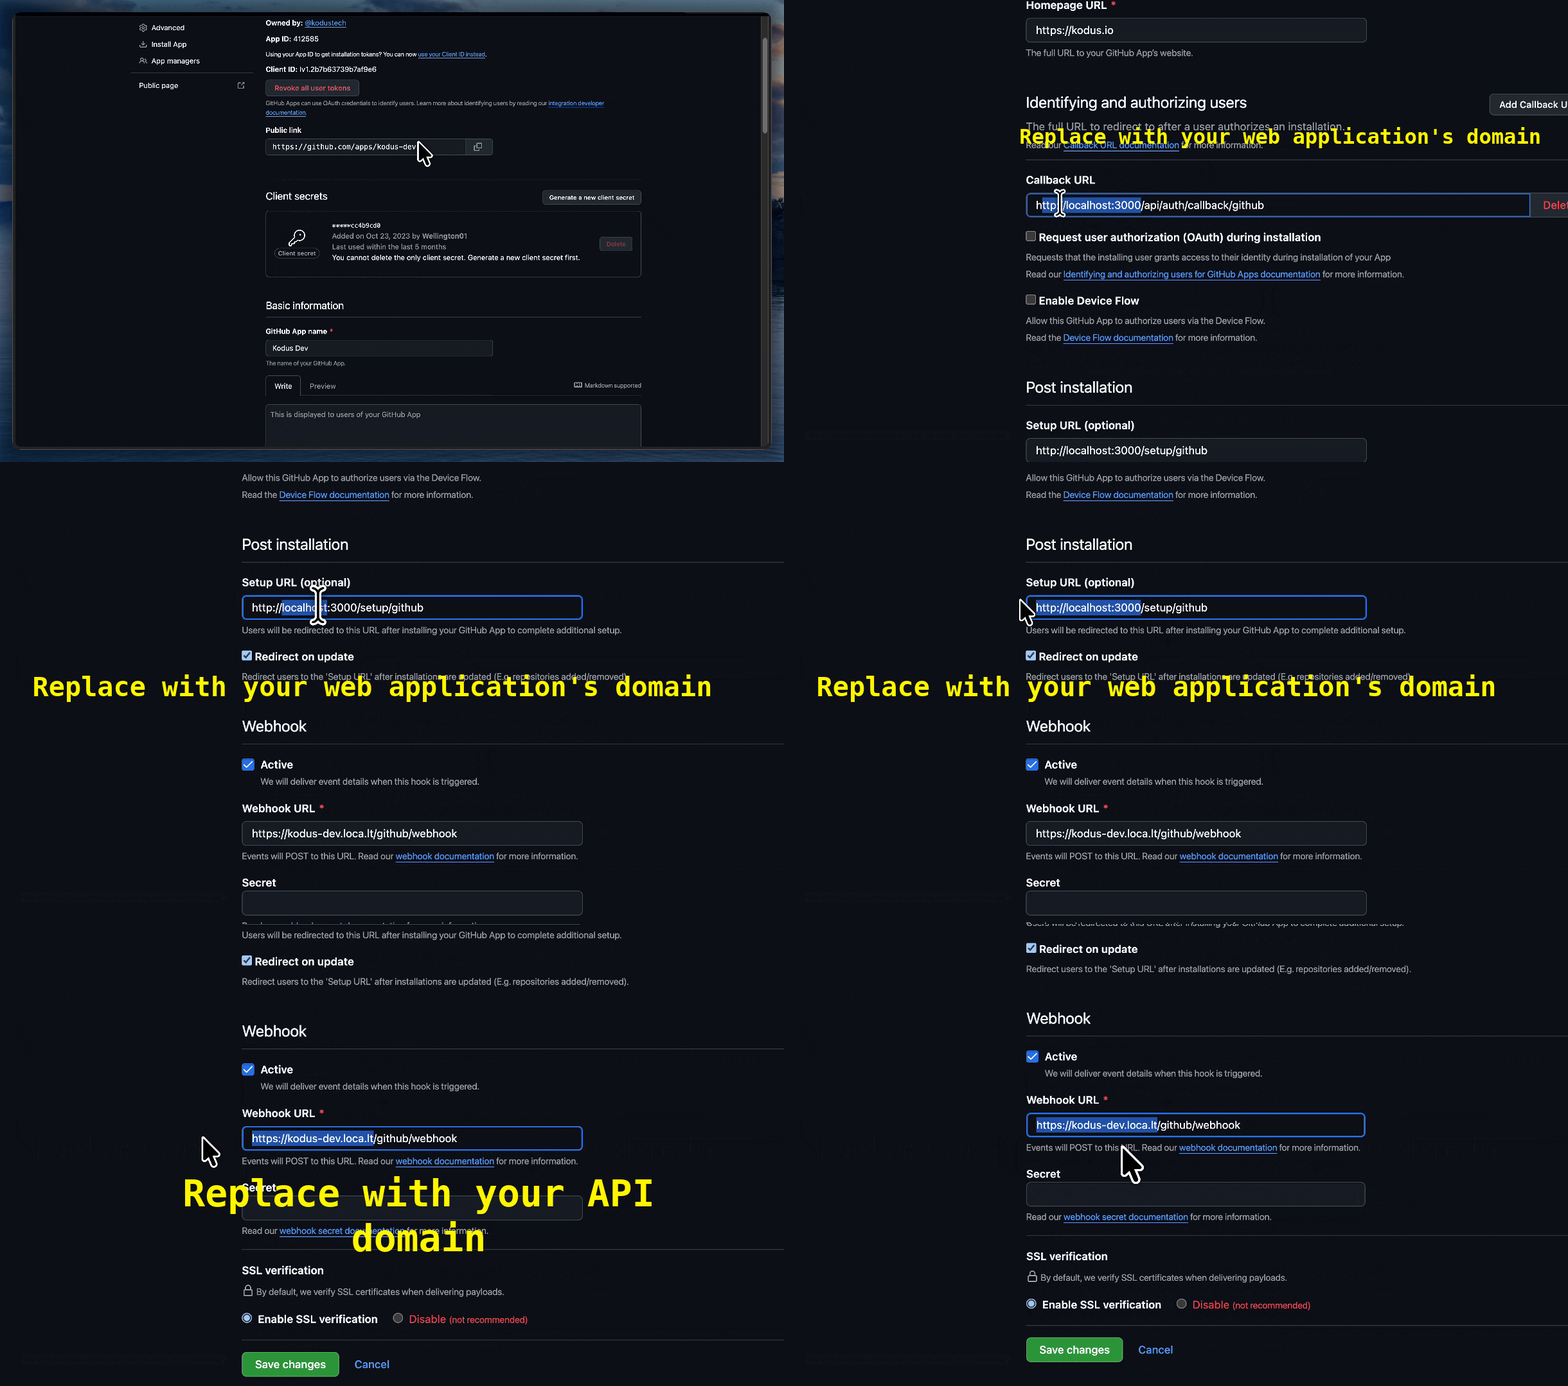 This step is critical to ensure installation and redirection work properly. Fill in the fields below, replacing
 WEB_DOMAIN with your actual URL:
-
Callback URL:
This URL is used to complete the authorization flow.
-
Setup URL:
- Check the option: Redirect on update This ensures that after installing the app, users are redirected back to Kodus to complete the setup.
Step 3: Configure the Webhook
The webhook notifies Kodus about events in your pull requests.Webhooks are handled by a separate service (port 3332). If you use the API domain here, ensure your reverse proxy routes
/github/webhook to the webhooks service. Otherwise use a dedicated webhooks domain.-
Webhook URL:
- Make sure the Active option is checked
Configure repository permissions and events
Under Repository permissions, configure the following access for the enabled features. Do not leave all permissions at No access.
Contents write access is only needed for features that commit repository files; read-only is sufficient for reading code. Install the app on the intended repositories and approve any newly requested permissions on existing installations.
Subscribe to Pull request, Pull request review comment, Issue comment, and Push. The current webhook handler accepts these four event types; other events may return 200 while being ignored.
Step 4: Collect Credentials and Add to .env
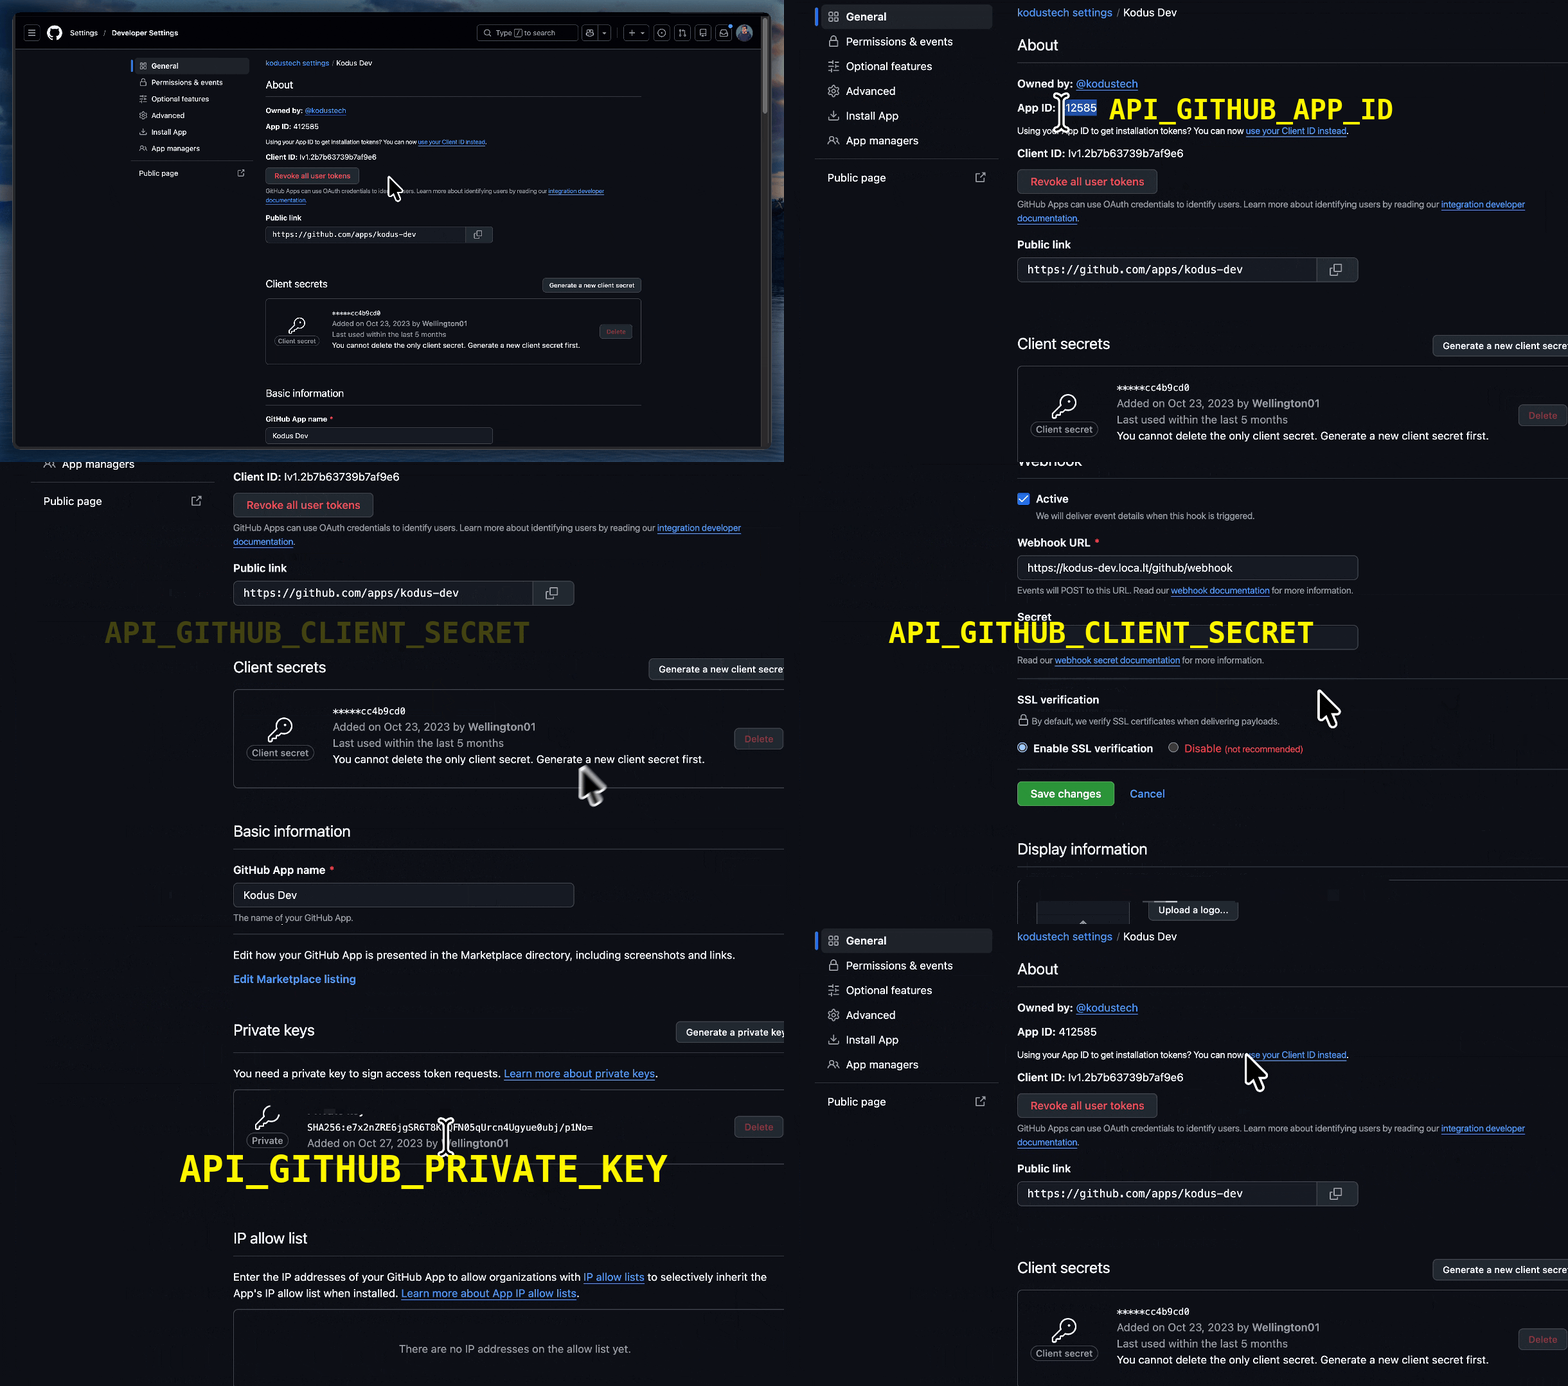 Now you need to get the credentials generated by GitHub and add them to your Kodus environment variables.
App ID
At the top of your app’s “About” page, copy the App ID. Add to your.env:
Client Secret
Go to the Client secrets section and click Generate a new client secret. Copy the generated value. Add to your.env:
Private Key
Scroll to the bottom of the page and click Generate a private key. This will download a.pem file. Open this file with a text editor and copy the entire content.
Add to your .env:
Installation URL
Open your GitHub App and click Install App. Copy the URL from the browser address bar (it looks likehttps://github.com/apps/<app-slug>/installations/new).
Add to your .env:
Summary of Environment Variables
At the end, your configuration file should contain:Verify the connection
The webhook URL must reach the webhooks service, not the frontend login page. UseAPI_DOMAIN only if its reverse proxy routes /github/webhook to that service; do not assume WEB_DOMAIN or any 200/307 response proves correct delivery.
Keep Redirect on update enabled. After installing or changing repository access, finish the Setup URL browser round trip back to Kodus. A successful ping or an ignored installation event does not create the Kodus integration.
In Kodus, open Repositories in the sidebar (formerly Git Settings) and confirm that the expected repository is listed. Then open a test pull request and check both the GitHub delivery response and Kodus webhook/worker logs. If connection is missing, check installation repository access, approved permissions, the Setup URL, and proxy routing.
GitHub registration reference.