

This is a beta feature. It is not yet production-ready and may not work as expected.
Overview
Plugins let you bring external business context directly into Kody’s review workflow. They extend Kody’s understanding with data from tools such as Jira, so feedback and actions stay aligned with your team’s processes.What Plugins Are
Plugins are Model Context Protocol (MCP) servers curated by Kodus. Each plugin exposes specific capabilities—like fetching tasks or checking specs—that Kody can use while collaborating with you on pull requests.Kodus MCP
Every workspace ships with the Kodus MCP already connected. It aggregates secure adapters for every supported Git provider—GitHub, GitLab, Bitbucket, and Azure DevOps—so you never need to install separate code-manipulation plugins. Beyond source control, the Kodus MCP unlocks first-party automations:- Manage Kody rules directly from a review thread (create, edit, or remove).
- Open Kody issues manually when you need a custom follow-up outside of the automated flow.
Using Plugins in Suggestions
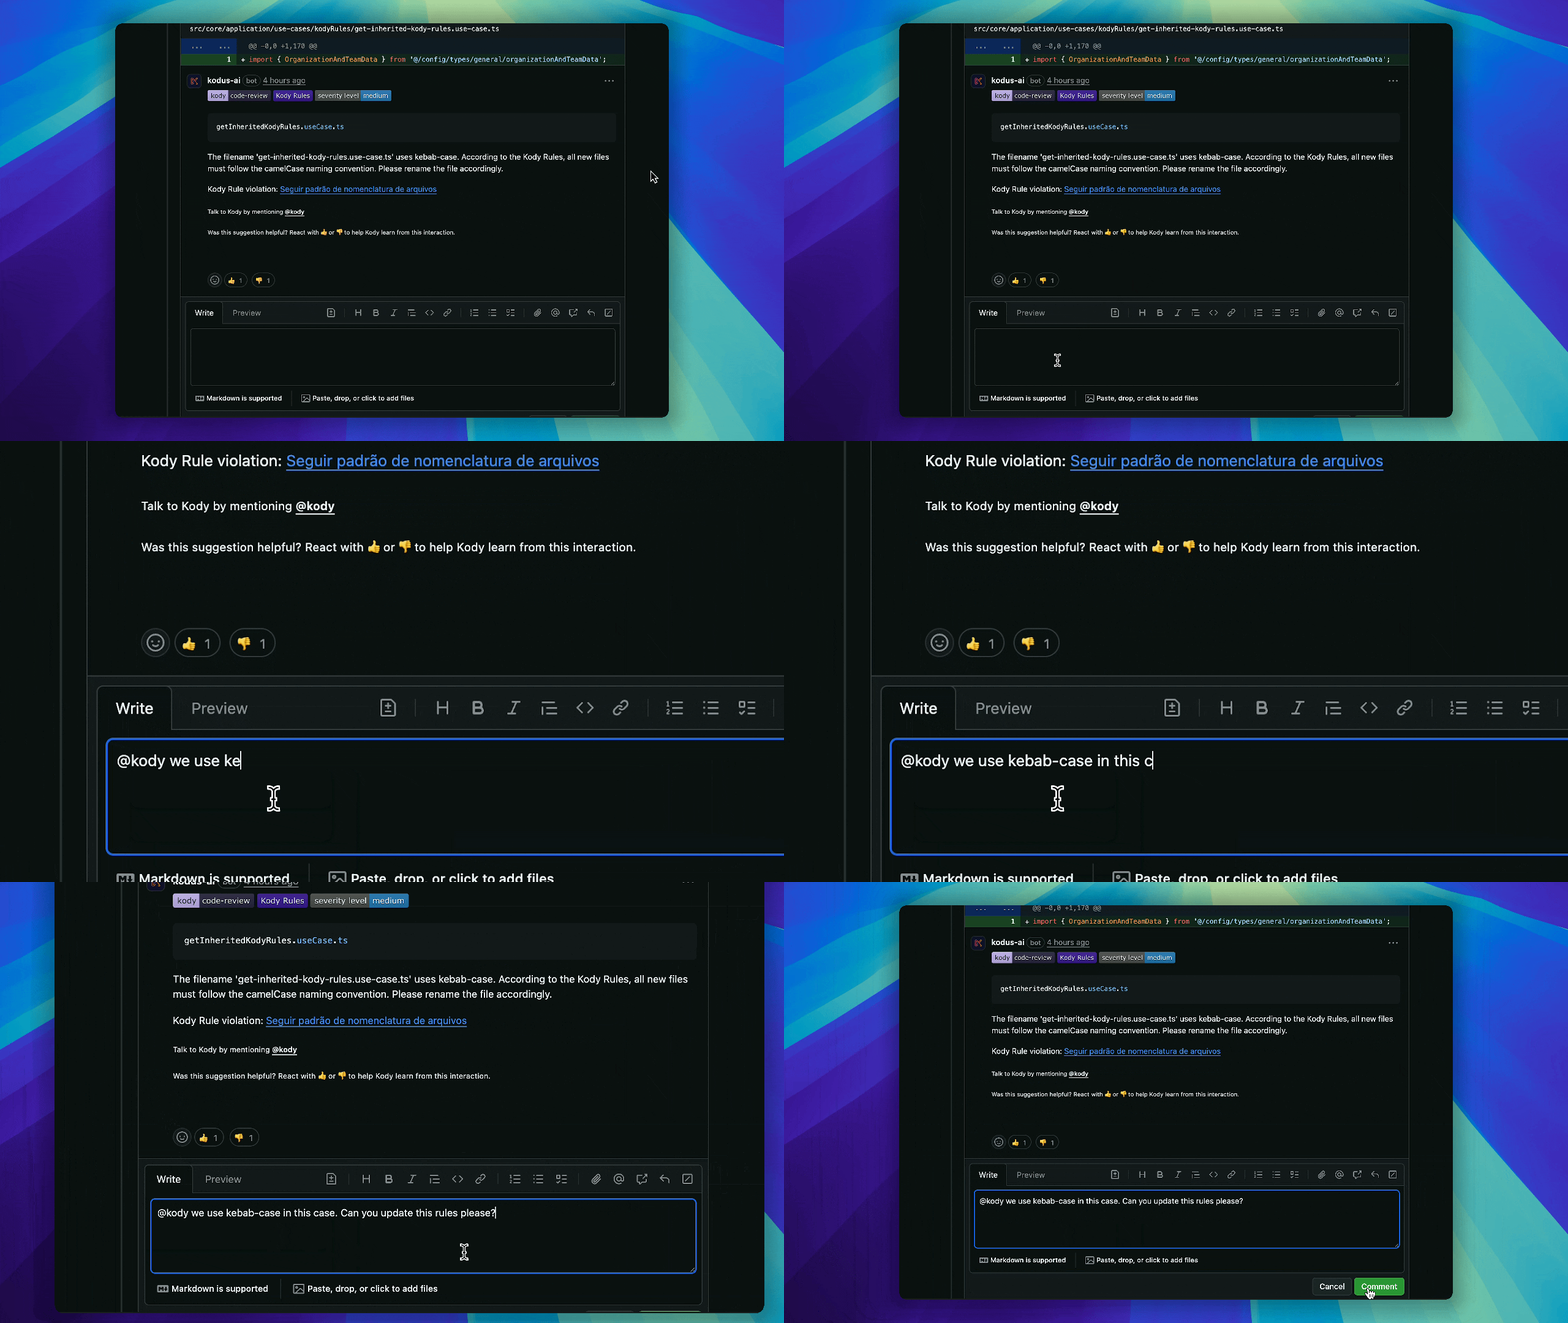 Interact with a plugin inside a code review suggestion by explicitly mentioning Kody in your comment. Once invoked, Kody calls the relevant plugin and replies in the same thread.
Example prompts
@kody, update this kody rule to ignore test files@kody, move this task https://jira.com/task-123 to DONE
Validating Business Logic
Use the@kody -v business-logic command when you want Kody to compare a pull request against a specification. Provide the spec content inline or share a link:
@kody -v business-logic https://jira.com/task-123
Business Logic Validation Guide
Explore the in-depth walkthrough with prerequisites and troubleshooting for
@kody -v business-logic.Controlling Access
Kody only sees the tools you enable for each workspace. Install the plugins that matter to your workflow and keep everything else private. To install one, open Plugins in the sidebar and pick a plugin from the grid. Authenticate (sign in through the app’s OAuth flow, or click Connect after entering an API token), choose the tools Kody may use under Selected tools, and click Install plugin. An installed plugin shows Installed; open it again to Update Tools or Reset Authentication.On the Free plan (and unlicensed self-hosted), Kody runs up to 3 installed plugins at a time; a banner on the Plugins page names the ones it skips. The default Kodus MCP doesn’t count toward that limit. Issue-tracker plugins can’t be installed when your code provider is Azure Repos or Bitbucket Data Center.
Custom Plugins
Bring your own MCP servers when you need capabilities beyond the curated catalog.- Open Plugins in the sidebar and, on the Add Custom Plugin card, click Add Plugin.
- Provide the endpoint details:
- Plugin Name (required) and optional Description to help teammates understand the integration.
- Optional Logo URL for a recognizable icon in the catalog.
- The MCP URL that hosts your server along with the expected Protocol (HTTP or SSE).
- The Authorization method (None, Bearer Token, Basic Auth, API Key, or OAuth 2.0) and any Custom Headers.
- Click Create Plugin to instantly make it available to Kody within the current workspace.
Tips
- Mention Kody only once per request so the correct plugin runs without duplication.
- Keep links accessible to your workspace; Kody needs permission to reach the target resource through the plugin.
- Review the plugin catalog periodically—new integrations are added as Kodus curates additional MCP servers.